How to Recover Files Lost after Reinstalling Windows Operating System?
Losing files after reinstalling Windows can be a frustrating experience. Whether it was an accidental reinstallation, an operating system upgrade, or a necessary step to resolve issues, the fear of losing important data can be overwhelming. However, there is hope! In this comprehensive guide, we will walk you through the process of recovering your files after a Windows reinstall, ensuring that nothing is permanently lost.
Understand the Importance of Immediate Action to Be Taken:
After a Windows reinstall, it is crucial to take immediate action to increase the chances of successful file recovery. Avoid creating new files or installing additional software on the disk where your lost files were located. This prevents overwriting the data and improves the likelihood of successful recovery.
Leverage System Restore Points:
If you had enabled System Restore before the Windows reinstall, you might be able to recover your files through this feature. System Restore creates restore points at regular intervals, which capture a snapshot of your system's configuration, including your files. By accessing the System Restore feature, you can roll back your computer to a previous state and recover your files as they were before the reinstall.
Explore Previous Windows Installations:
Windows automatically saves previous installations in a folder called "Windows.old" during a reinstall. This folder contains essential files, including user data, program files, and system configurations from your previous installation. By navigating to this folder, you may be able to locate and recover your lost files. However, exercise caution and ensure you have a backup of your important files before deleting the "Windows.old" folder.
Utilize Third-Party Data Recovery Software
Third-party data recovery software can be a lifesaver when it comes to retrieving your lost files after a Windows reinstall. There are many data recovery applications available online to recover lost files after a Windows reinstallation. Among them, Windows File Recovery software is recommended by the industry experts to regain the lost files after reinstalling Windows. Follow the instructions provided by the software and let it work its magic to recover your valuable files.
Windows File Recovery Software - Free Software to Recover Files Lost after Reinstalling Windows OS:
From the above-discussed file loss scenarios, it might appear that the essential files are lost permanently. But the files deleted/lost by reinstallation process are not permanently deleted from the system. They can still be recovered with the help of Windows File Recovery software. Files lost due to reinstallation of Windows can be recovered back until they are overwritten with the new data. So always avoid saving of any new files into the operating system before recovering the lost files.
The features of this recovery tool include the restoration of lost files even after reinstallation of the Windows. The file lost due to defragmentation failure or incomplete reinstallation process can also be recovered using this utility. This software recover files after Windows reinstall. It can also perform file restoration on a formatted drive. This software can identify and restore up to 300 file types. The software creates disk images in order to bypass the bad sectors in the hard drives. It also recovers files after Windows reinstall from FAT16, FAT32, NTFS5, exFAT partition/drives. The files can later be recovered back from the disk images. The recover files are sorted on the basis of their name, date of creation, file type and size. You can download the above-mentioned software in order to get back your lost files from Windows operating system. The software works the best and can recover files from the Microsoft Windows Server 2003, Microsoft Windows Server 2008, Windows XP, Windows Vista, Windows 10, Windows 11, Windows 8 and Windows 7.
Steps to Recover Files Lost after Windows Reinstallation:
Step 1: Launch the software on your Windows PC.
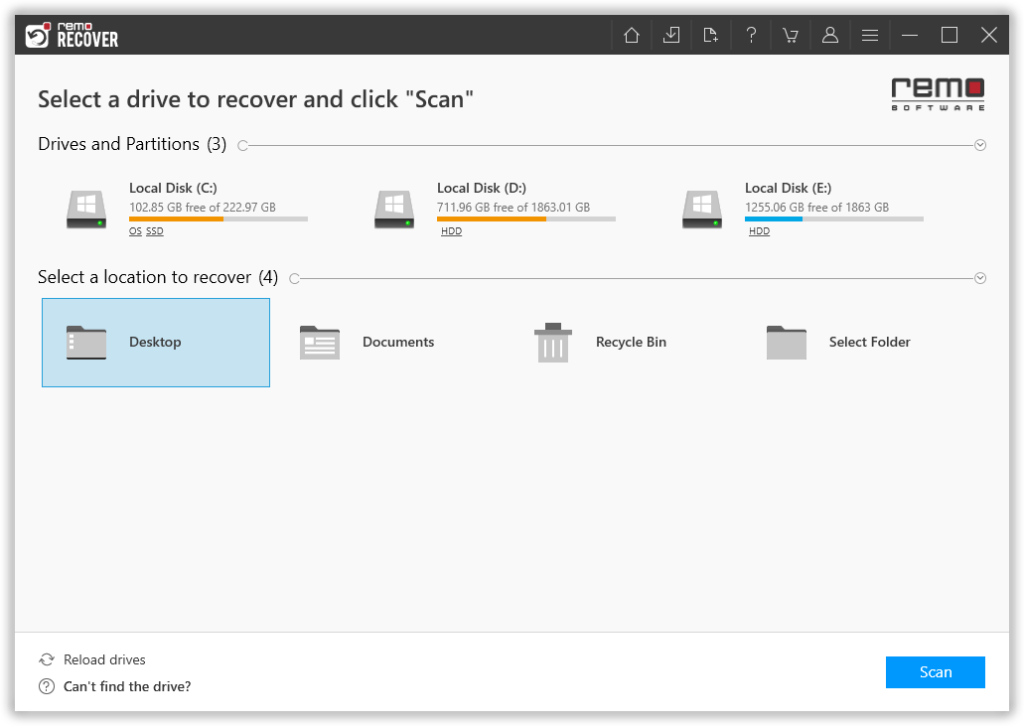
Step 2: From the main screen, you are asked to choose the drive or the folder from where you want to recover files and click on the Scan button.
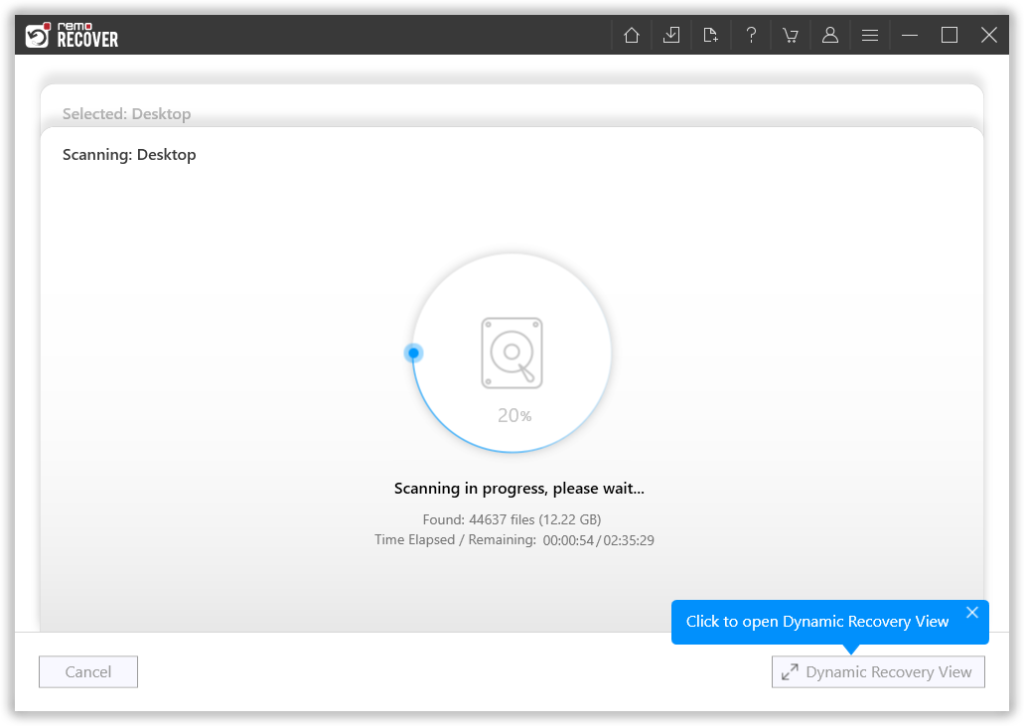
Step 3: The tool starts scanning the selected drive; you can use the Dynamic Recovery View option to view the file recovery process.
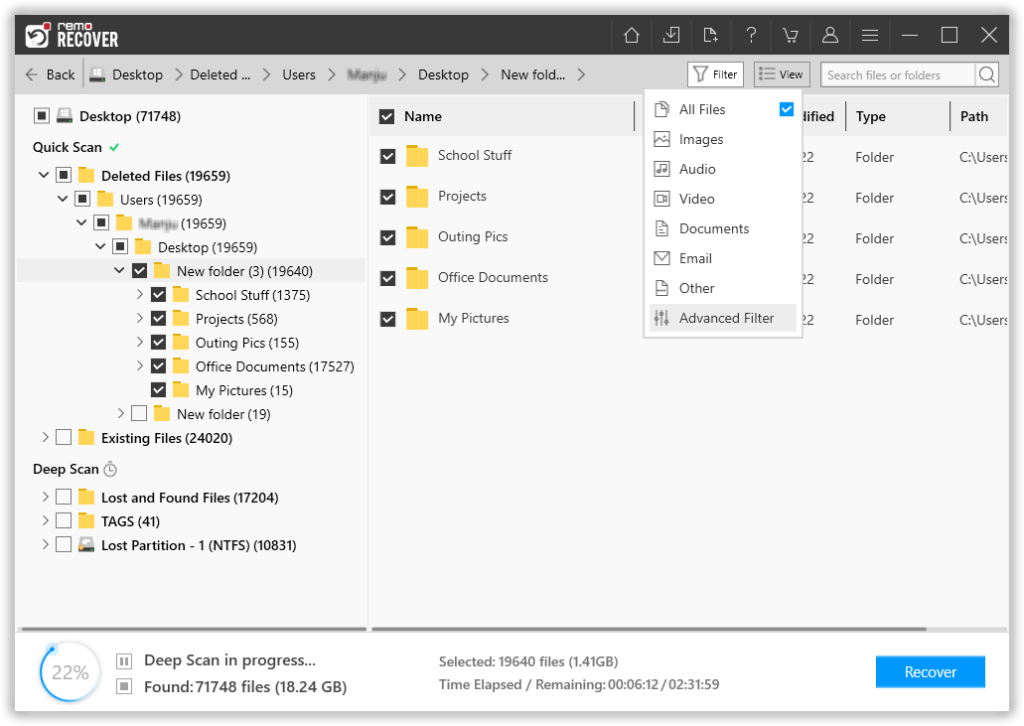
Step 4: A complete list of recovered files from the selected drive will get displayed on your screen. Options like the Advanced Filter option and the Search option come to help you effortlessly find the files that you are looking for.
Step 5: This software also comes with our most powerful feature to date, called the Augmented Preview option. To help you view the recovered files without having to save the data.
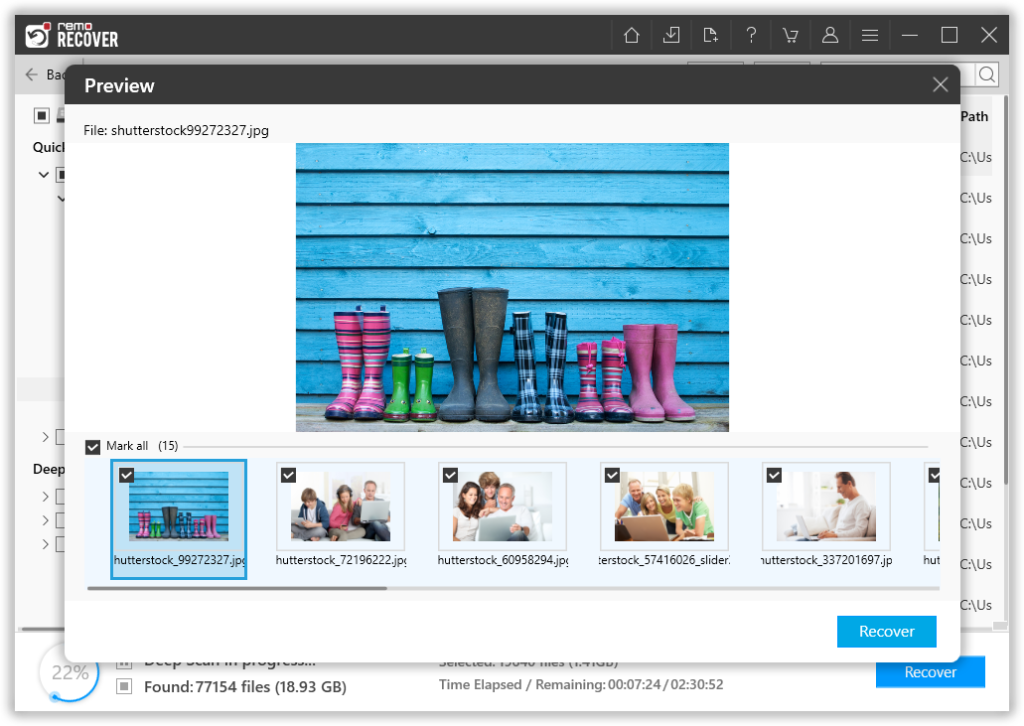
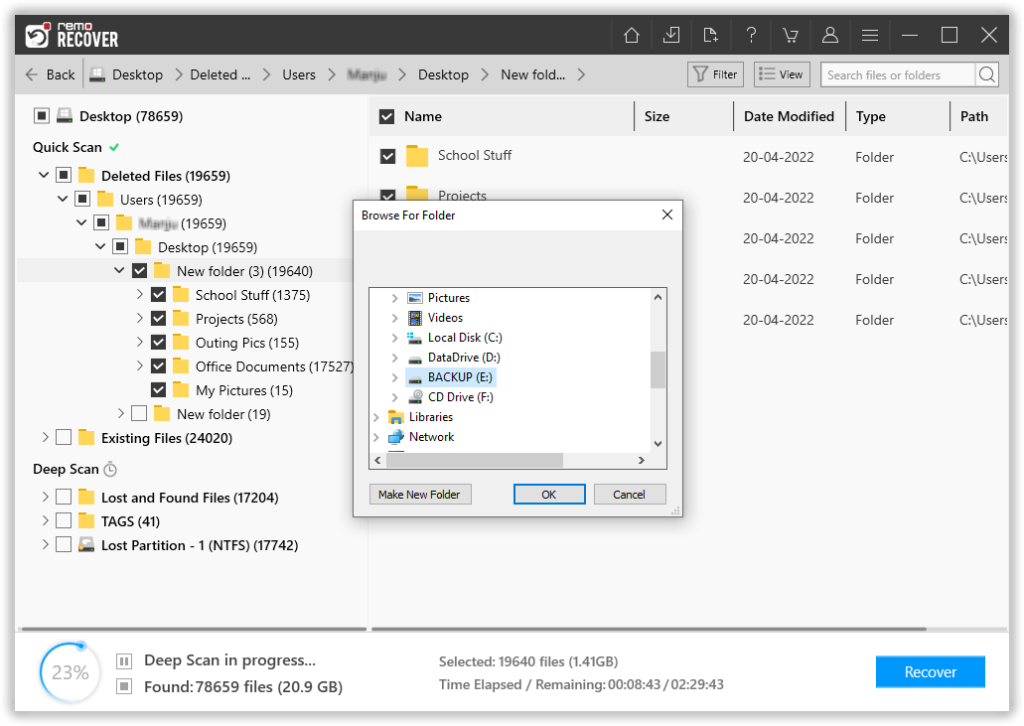
Step 6: The software also lets you select the file(s) that you would like to recover without bringing in any files and folders that you do not want to. The last step in the file recovery journey is to select a location where you want to save the recovered files.
