Method 1:
Go to This PC Manage Disk Management. Now check if the Recovery Partition is present in it or not. If it is present, then you can use it to revert to Home edition.
Method 2: Do a Clean Installation of Windows 10-
If you don’t have a Recovery partition, then your next option is to clean install Windows 10. During installation, if you format a partition, then your data gets erased. So make sure you take a backup before starting the process
Now go ahead with the following steps to perform a clean install
- Run Media creation tool
- Select Create installation media for another PC
- Select the edition, language, and architecture for Windows 10
- Next, follow the steps to create installation media, and select Finish after completion
- Once you are about to start a clean installation, turn on your system, insert the USB drive/DVD you created, and shut down the computer
- Now restart your computer, press any key to boot from USB drive/DVD
Suppose the current version of Windows starts when you restart the computer, then open a boot menu or change boot order in PC's UEFI or BIOS settings. This is done so that your PC boots from the media. Suppose changing boot menu or order doesn't seem to work out, then sign in to Windows again, shut down and start the computer.
- Enter the language, other preferences on the Install Windows page, and hit Next
- Select install the Windows
- Fill up- Enter the product key to activate Windows screen, click Skip (Since Windows 10 is already activated, you don't have to enter the product key)
- Accept the license terms in the next screen, and click Next
- In the Which type of installation do you want? page, choose Custom
- Next, select the partition where you want to install Windows, and select the formatting option required (if needed), and follow the remaining instructions
- Once you're done, click Next
- Complete the rest of the setup instructions to finish the Windows installation.
Hope this helps and you are able to downgrade from Windows 10 Pro to Windows 10 Home. During the installation process, if you have formatted partition without backing up data, then don’t worry that your files and folders are completely lost. You can recover deleted folders from Windows 10, files erased after format, emptied from Windows 10 Recycle Bin, etc. with the help of Windows File Recovery tool.
Suppose Clean Install hasn’t done the trick and Windows 10 goes back to Pro edition, then here's another method you can try out.
Method 3:
- Type Win + R to bring up the Run window. Type regedit, press the Enter to open Registry Editor
- Browse HKEY Local Machine à Software a Microsoft a Windows NT à CurrentVersion
- Here, change EditionID to Home (for this, double click EditionID, change the value from Pro to Home, and click OK)
- Next, change ProductName to Windows10 Home.
- Again, browse key HKEY Local Machine a Software a Wow6432Node a Microsoft à Windows NT a CurrentVersion and change the values as stated in the steps 3 and 4.
- Close Registry Editor
Now, insert Windows 10 Home installation media, and do an in-place upgrade by launching setup from the desktop. Enter the valid Windows 10 Home product key when asked for, and select what to keep i.e., Settings, personal files and apps, only personal files, or nothing. In-place upgrade for Windows 10 Home will now be done
Note: If you are planning to downgrade from Windows 10 to Windows 8, 7, Vista, XP and other lower versions, then you can follow any one of the three methods which are mentioned above. Please do maintain a timely backup of the files, in the case, if you lost the files or got deleted. If this happened then don't get worried, Windows File Recovery application helps you to recover deleted or lost files on Windows 7. Here are the simple steps involved in restoring deleted or lost data from a different version of Windows OS.
Steps to Recover Deleted Files on Windows 10:
Step 1: Launch the software on your Windows PC.
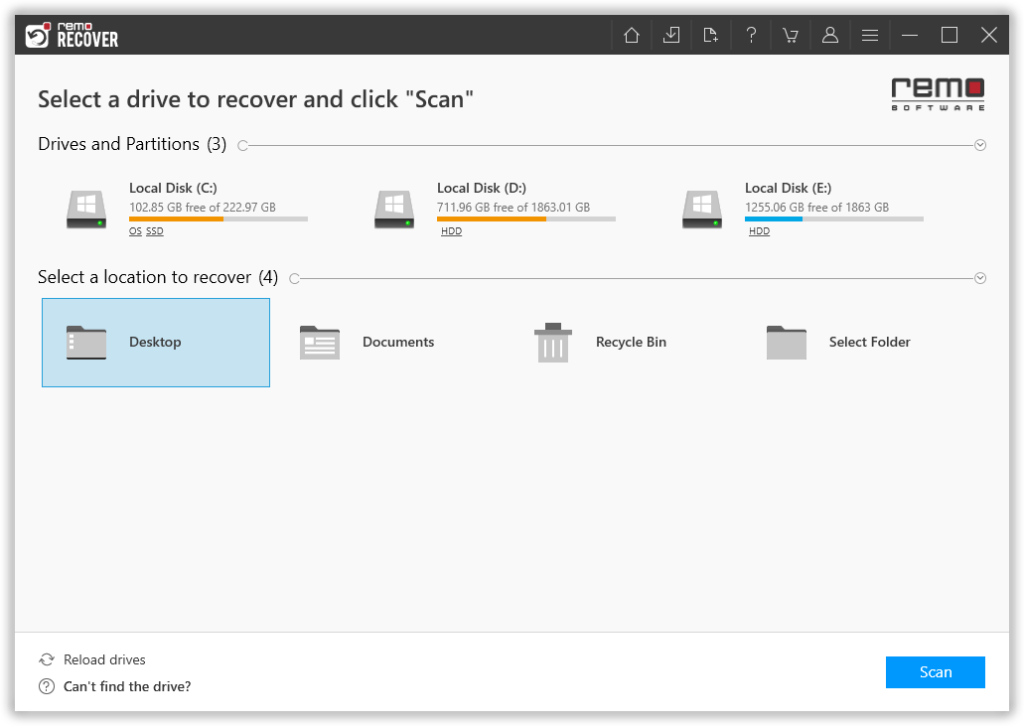
Step 2: From the main screen, you are asked to choose the drive or the folder from where you want to recover files and click on the Scan button.
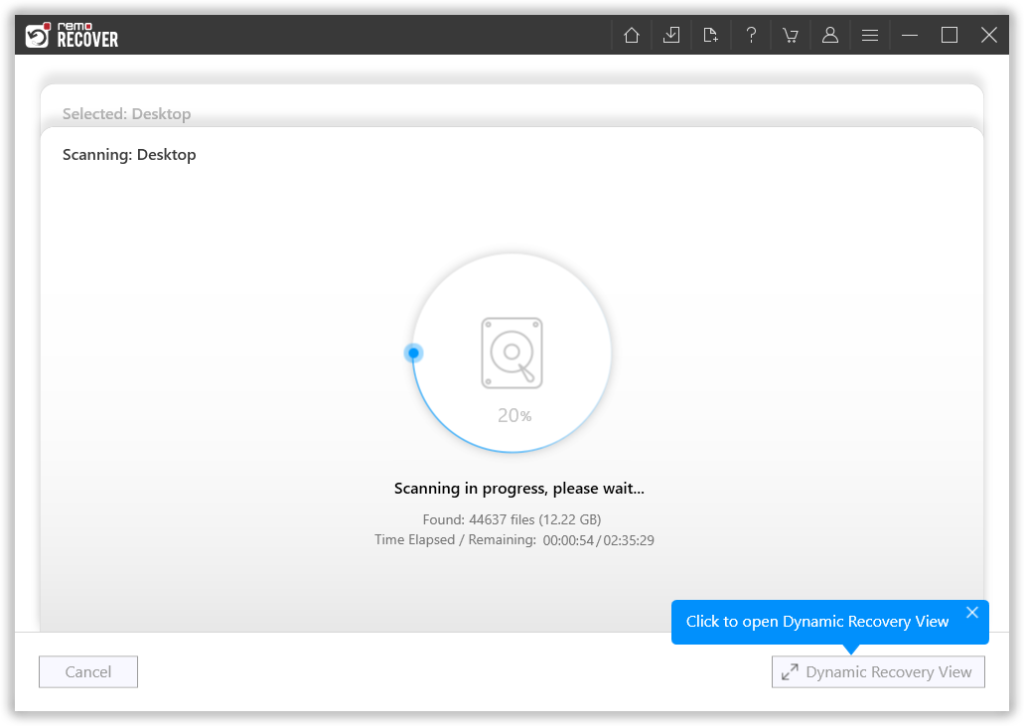
Step 3: The tool starts scanning the selected drive; you can use the Dynamic Recovery View option to view the file recovery process.
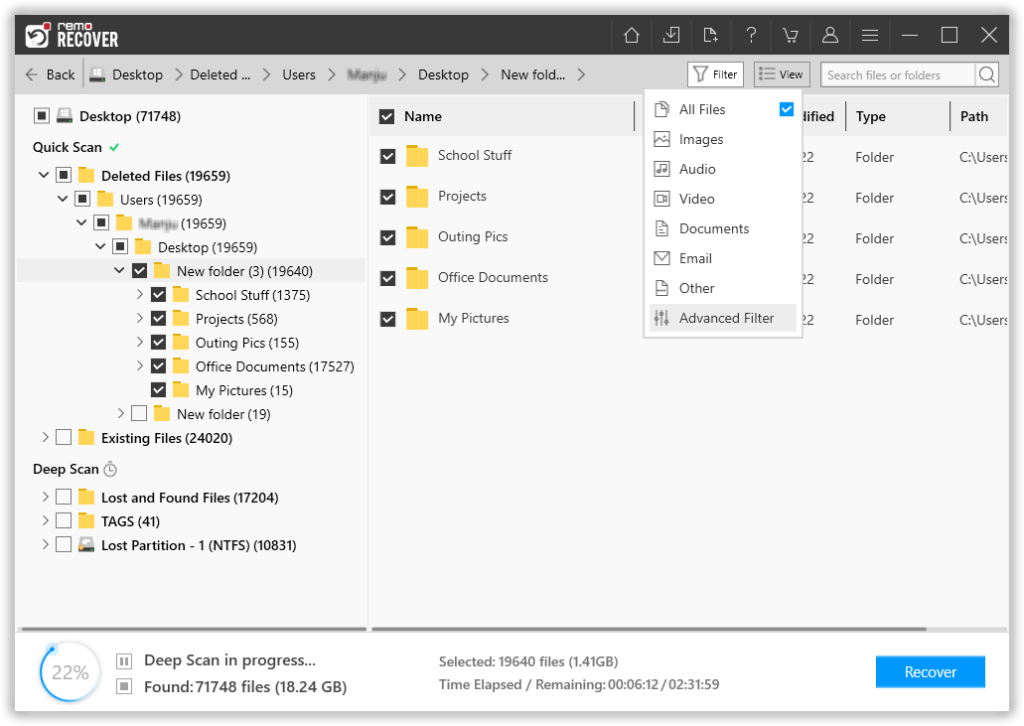
Step 4: A complete list of recovered files from the selected drive will get displayed on your screen. Options like the Advanced Filter option and the Search option come to help you effortlessly find the files that you are looking for.
Step 5: This software also comes with our most powerful feature to date, called the Augmented Preview option. To help you view the recovered files without having to save the data.
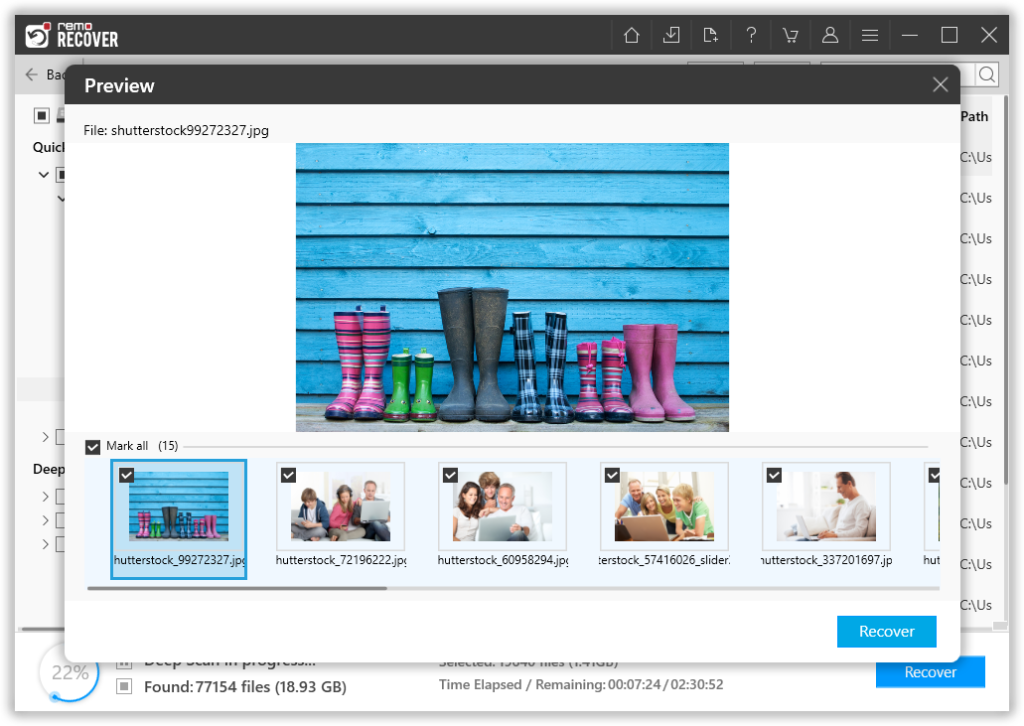
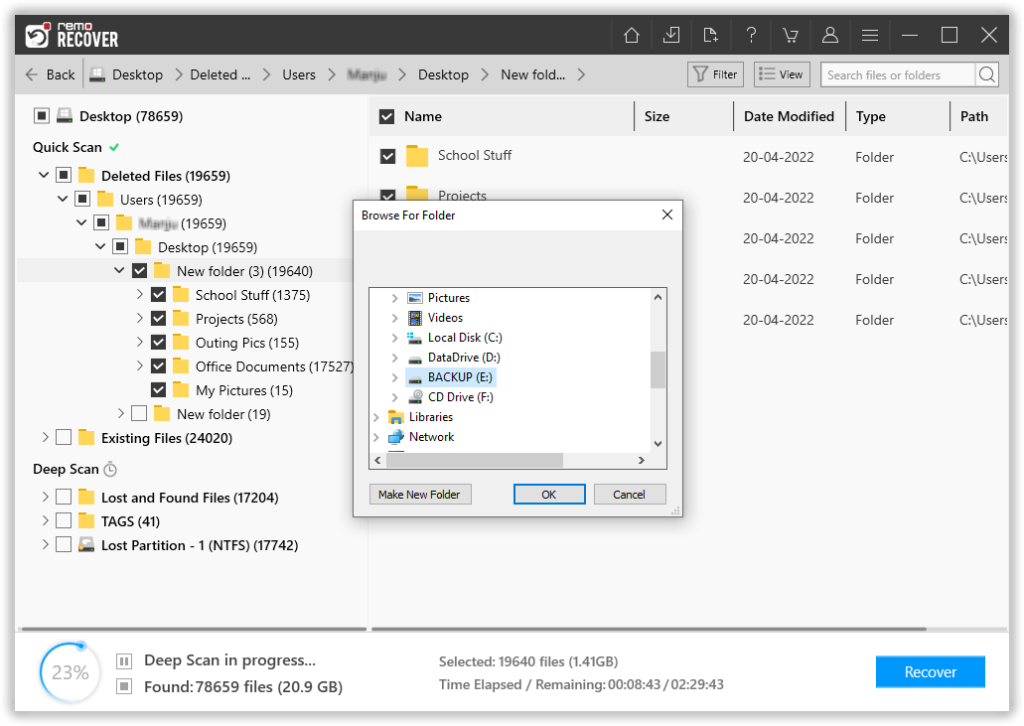
Step 6: The software also lets you select the file(s) that you would like to recover without bringing in any files and folders that you do not want to. The last step in the file recovery journey is to select a location where you want to save the recovered files.
